How I made my self-hosted WordPress Blog
Table of Contents
How I made my self-hosted WordPress Blog
Hello and welcome to my first blog post. In this entry I’ll show you the process I followed for creating this blog: a self-hosted WordPress blog in my custom subdomain; and how you can do it for free (excluding the subdomain bit).
Create a VM to host the blog
First we need to have the server we’ll use to host the blog. I’m using Oracle Cloud since (at the time of writing) it offers two VM’s (VM.Standard.E2.1.Micro) to play around with for free. They don’t have the most resources, but since I’m not planning for my blog to get a lot of traffic it is enough. The only downside is that you need a credit card to create your account, but that is pretty much the norm for any cloud service (Azure is the only one I know that doesn’t do this).
To start, we have to go to the “Instances” section in the Oracle Cloud dashboard.
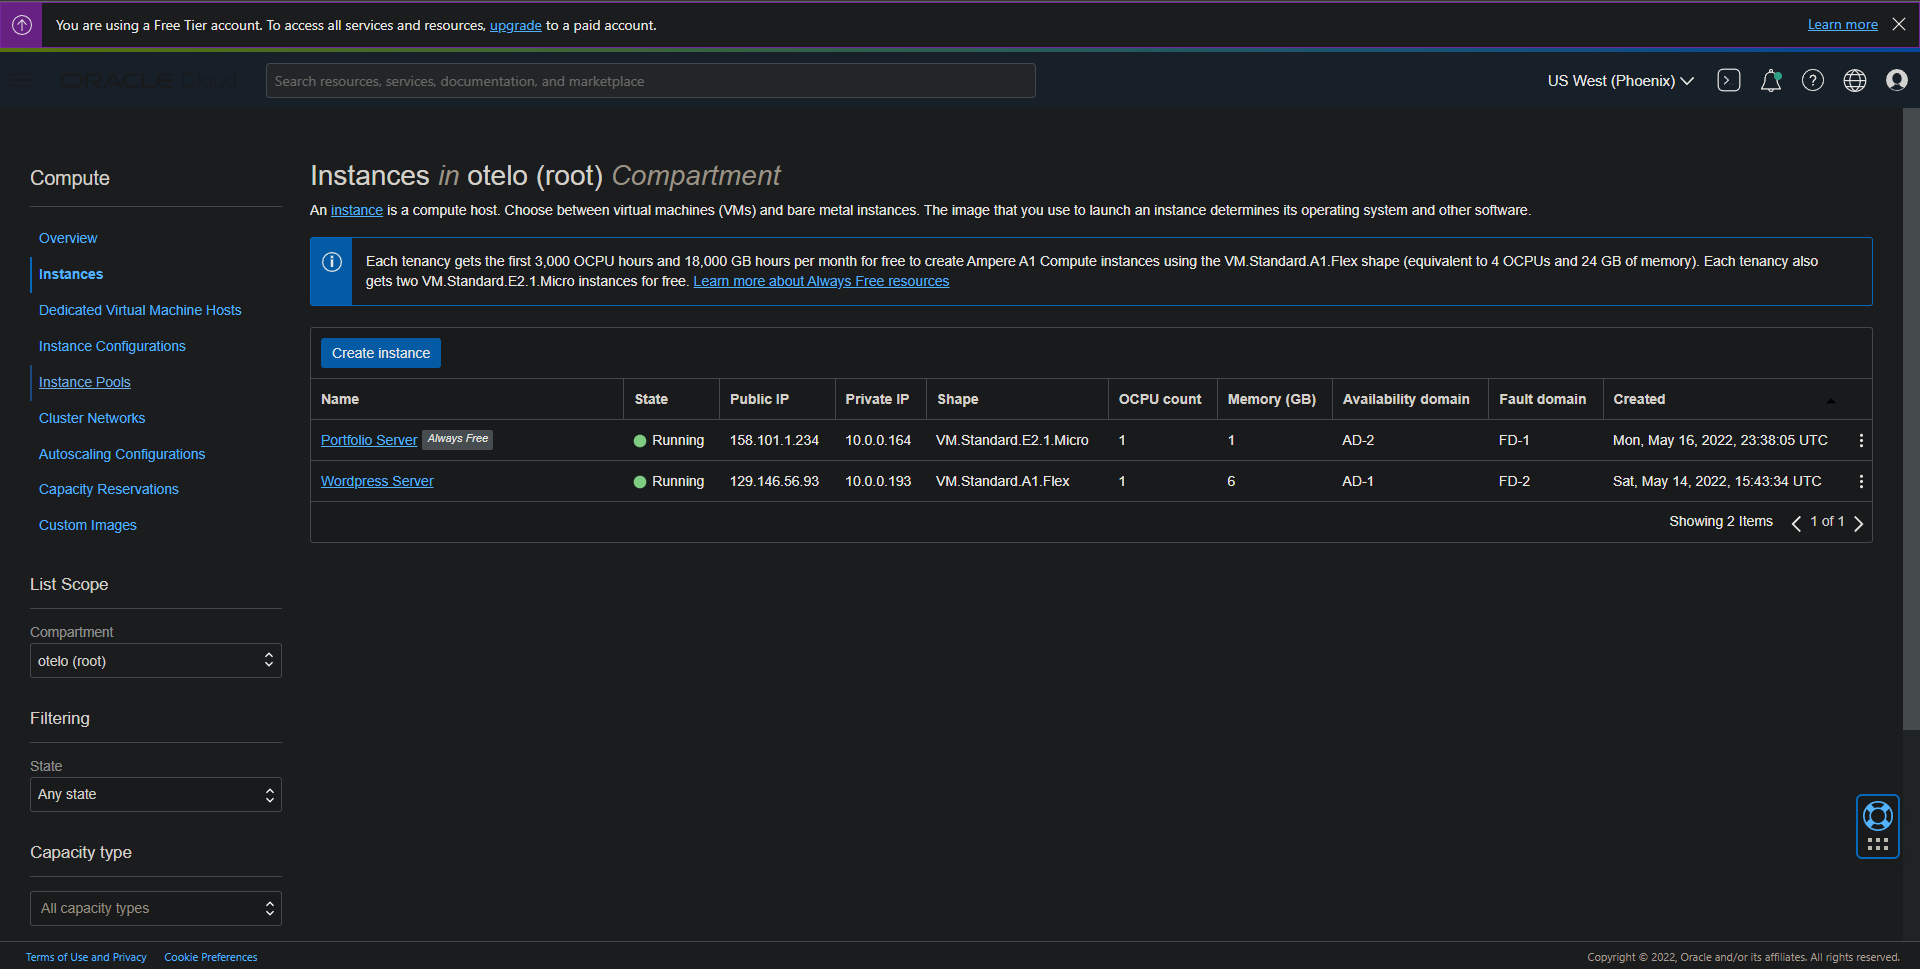
Then we click on “Create Instance”. In this screen we can specify how we want our VM to be. The settings I changed were:
- Availability Domain: AD 2 (So we can access VM.Standard.E2.1.Micro)
- OS: Canonical Ubuntu 20.04
- Shape: Specialty and previous generation -> VM.Standard.E2.1.Micro
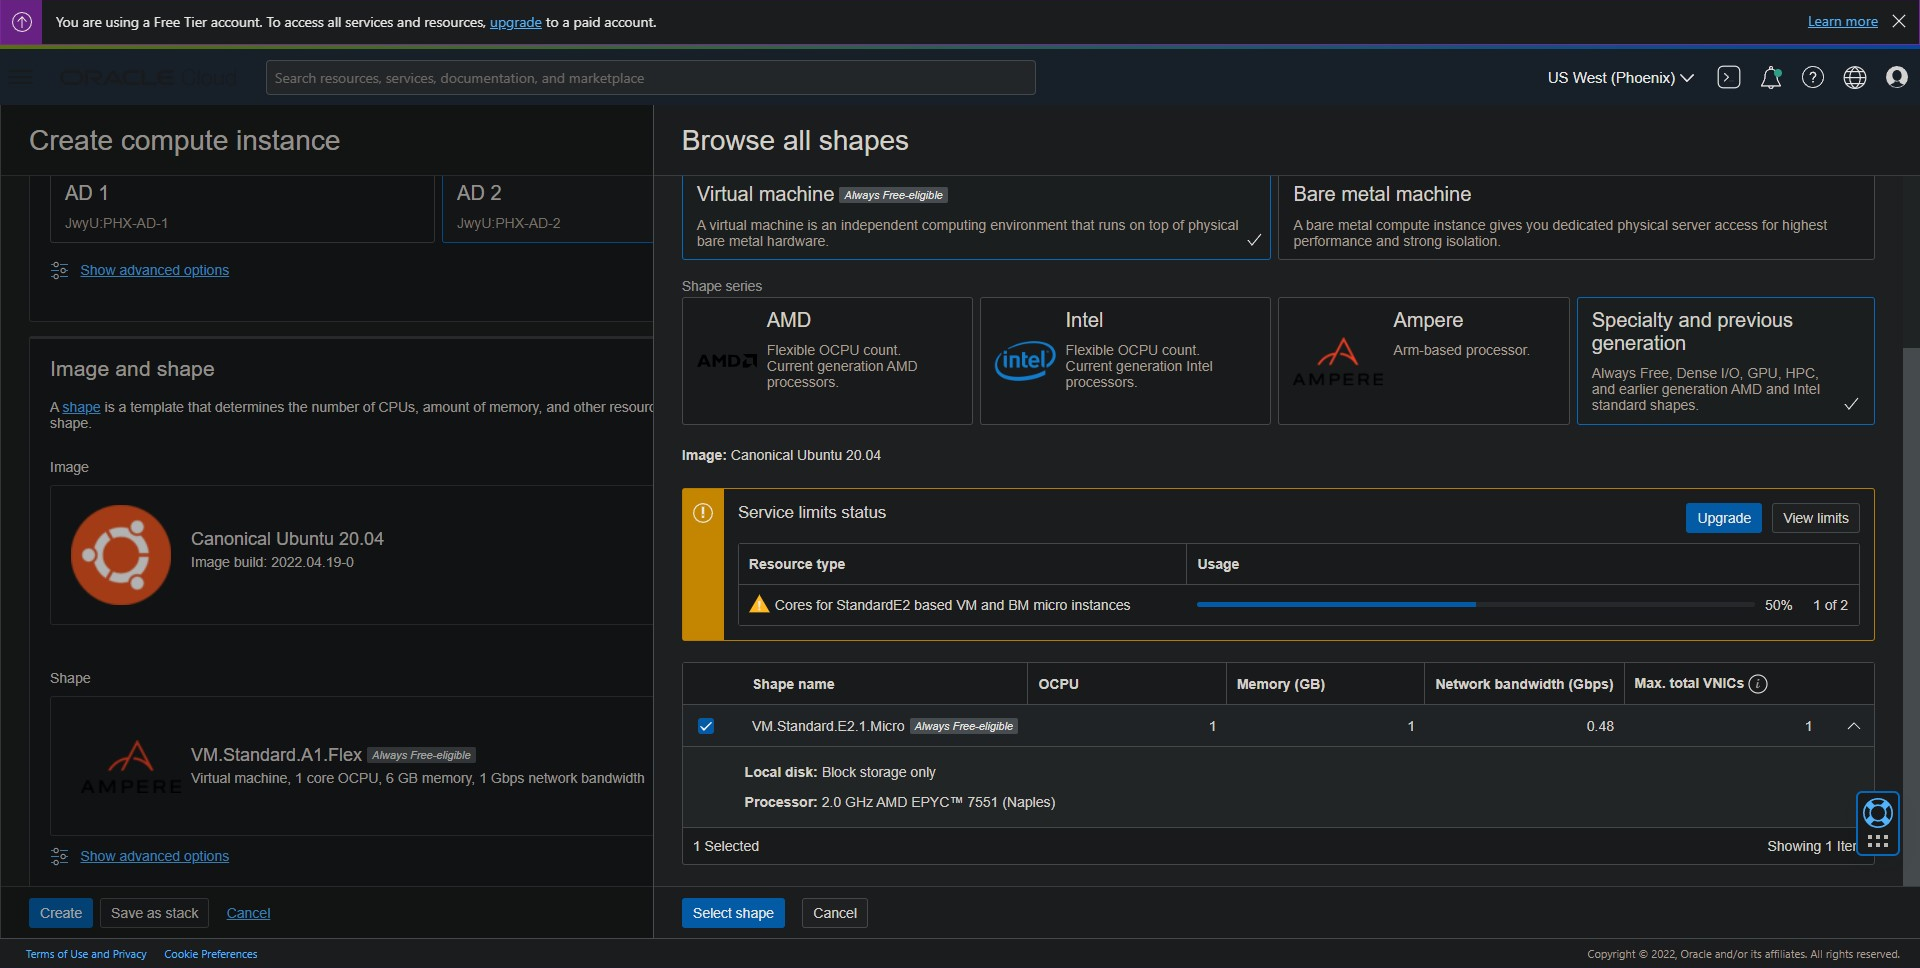
Download your public and private keys so you can access your VM once it is ready. In my case I use the Termius client for SSH since it makes it very easy to work with keys. Once you changed the above configurations, click on “Create” and wait for your VM to be provisioned.
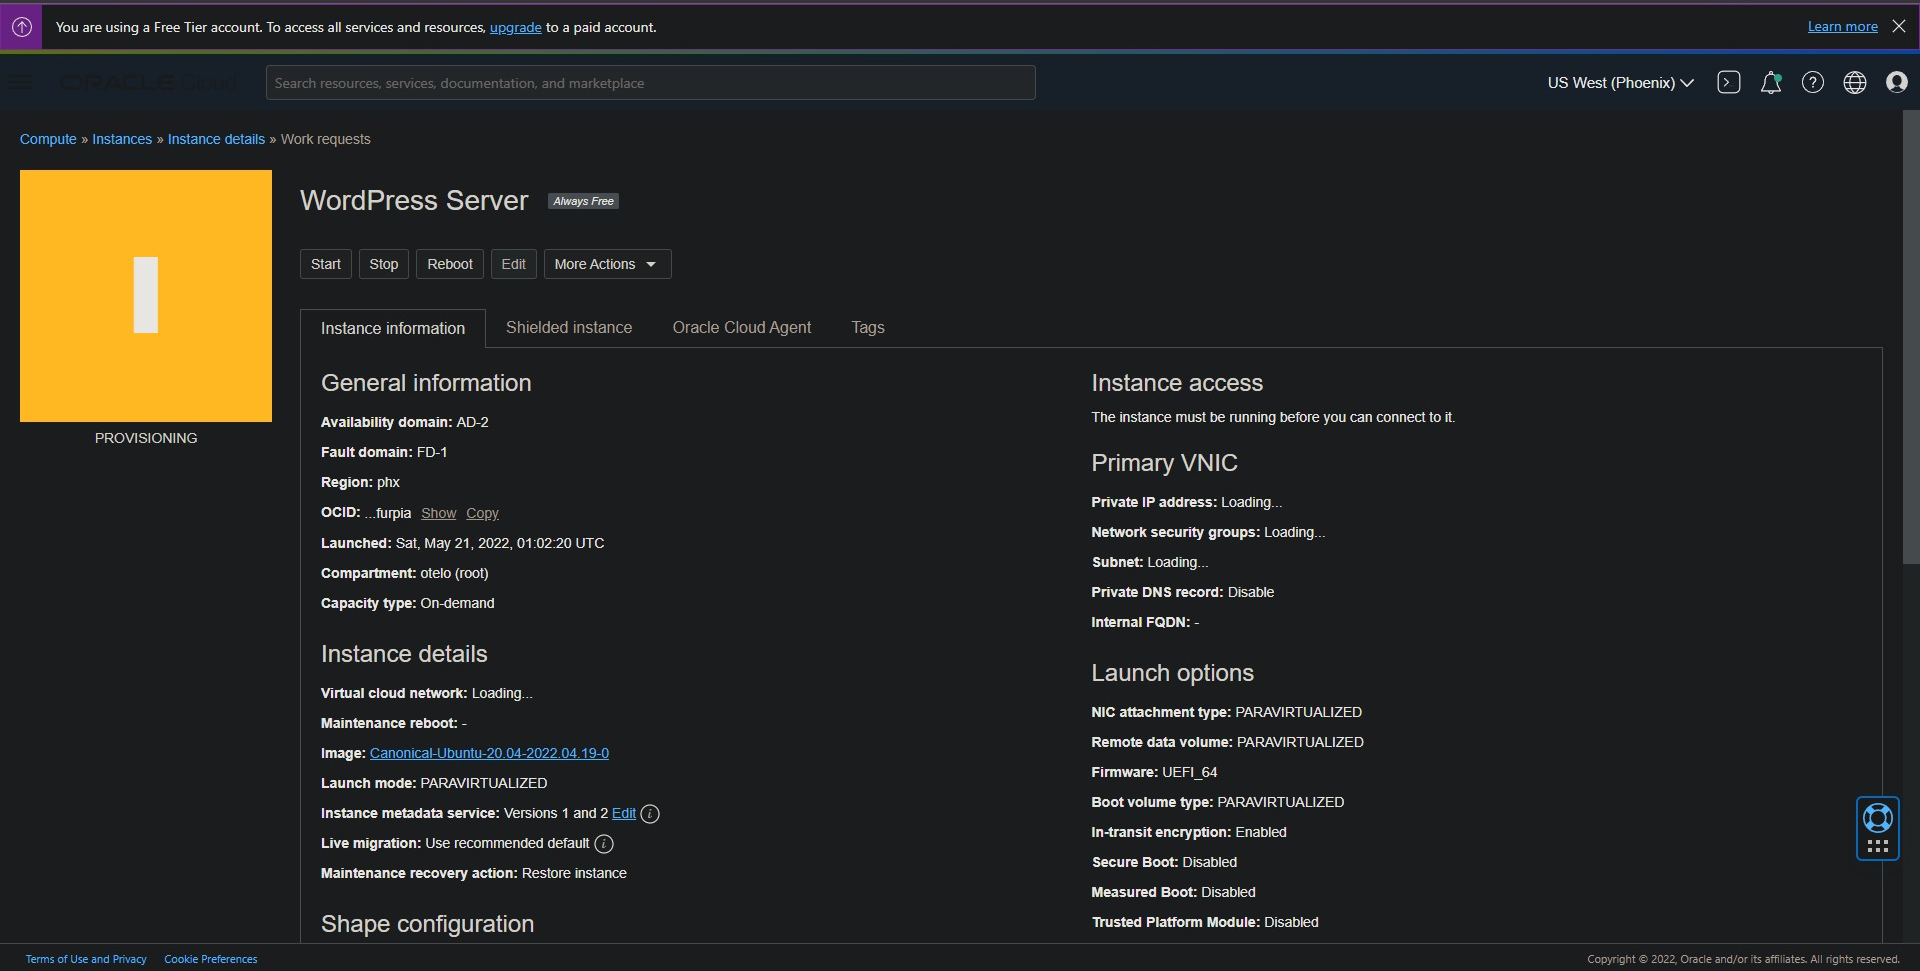
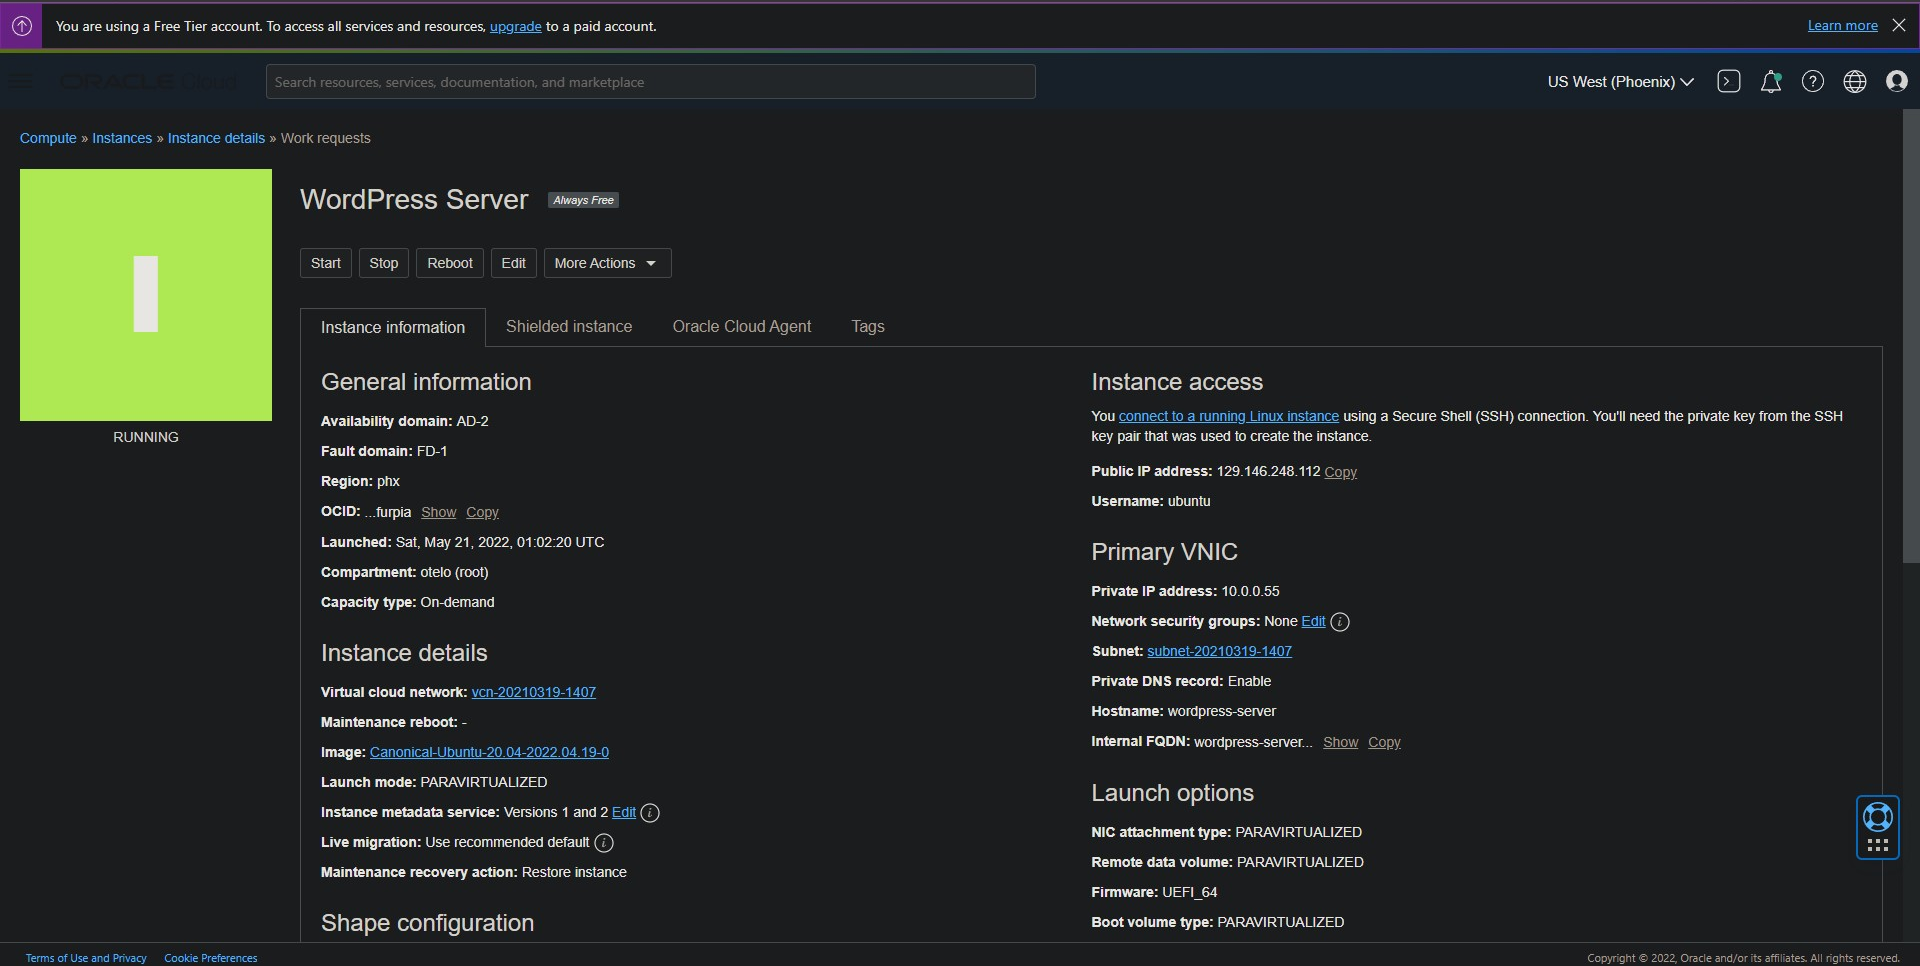
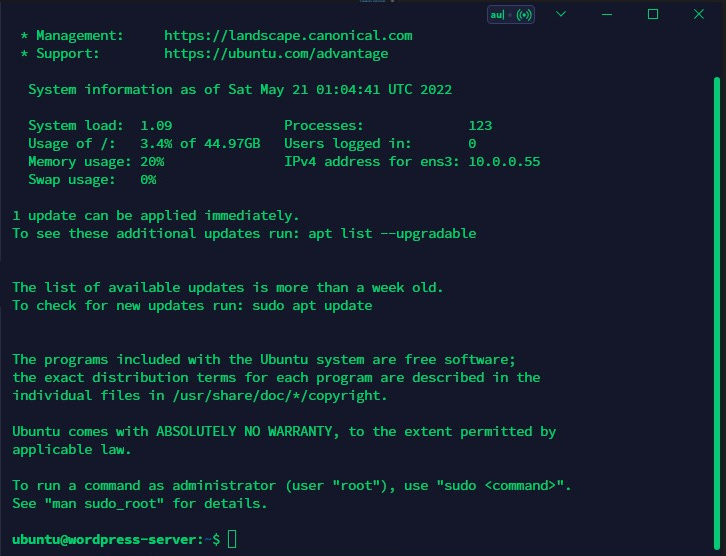
Once it says “Running” note the public IP address and connect to the VM.
Enable Internet Access
By default, the VM’s only accept connections on port 22. We have to allow connections from port 80 so we can serve our blog and have it accessible to anyone.
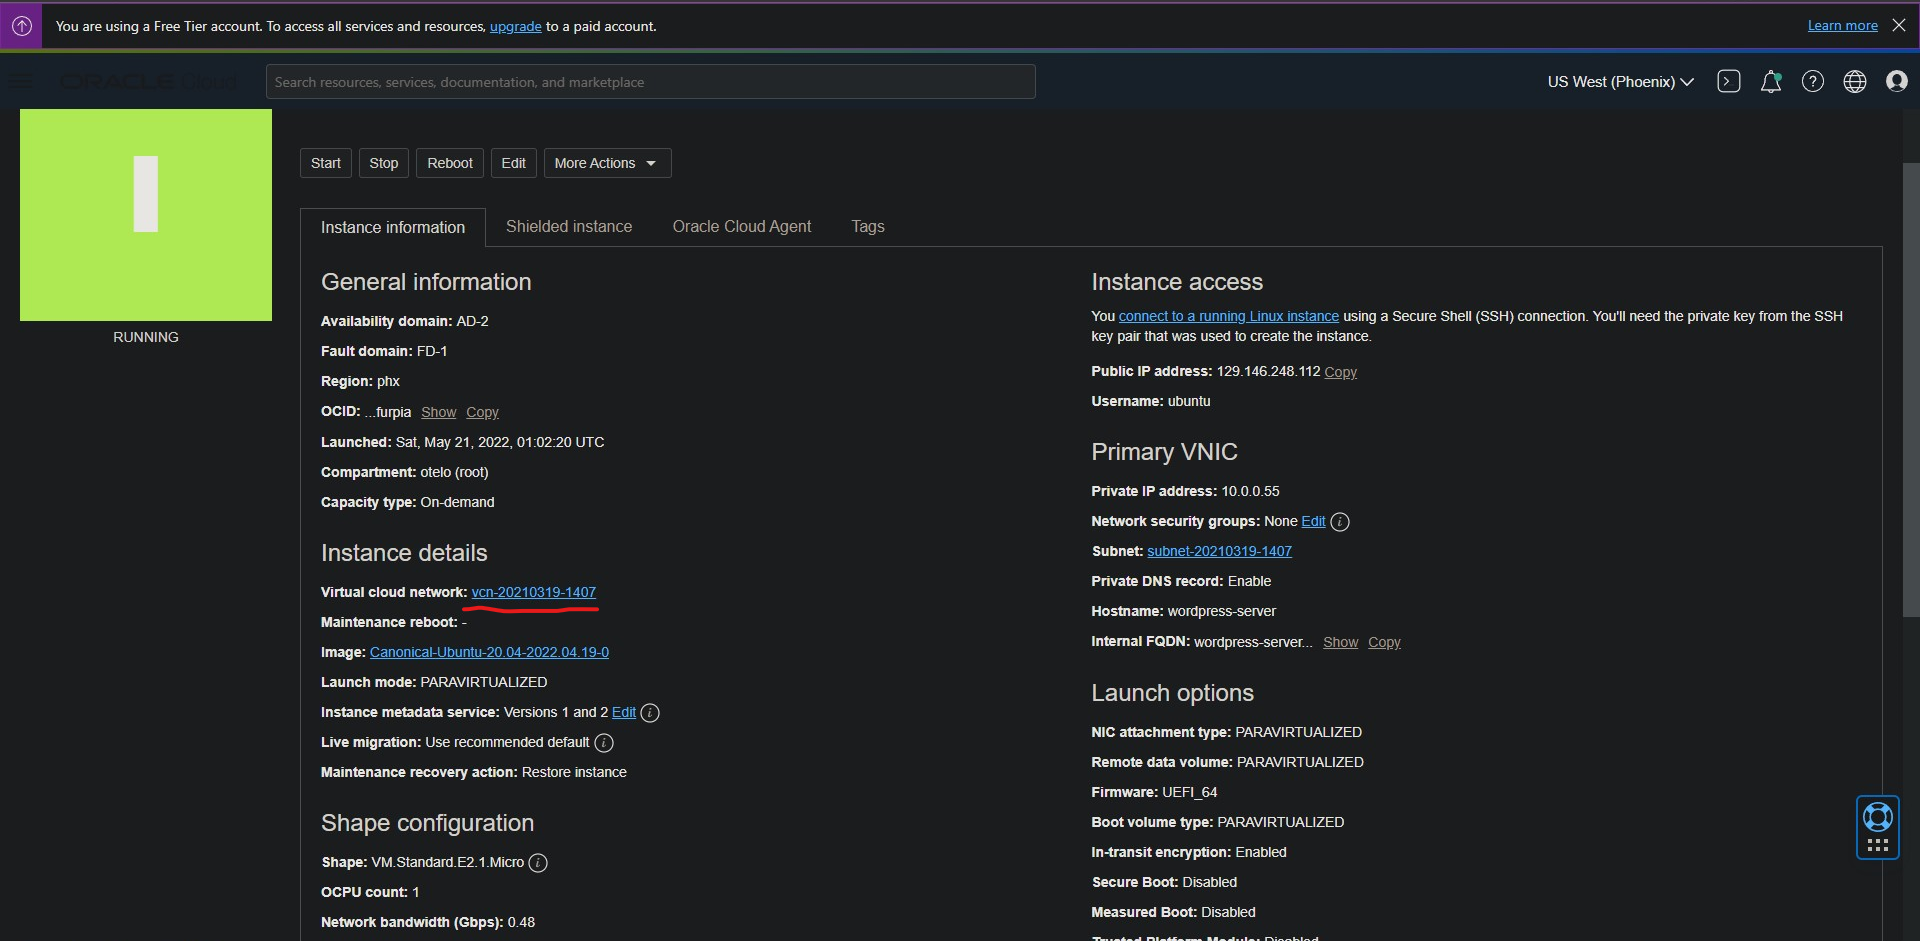
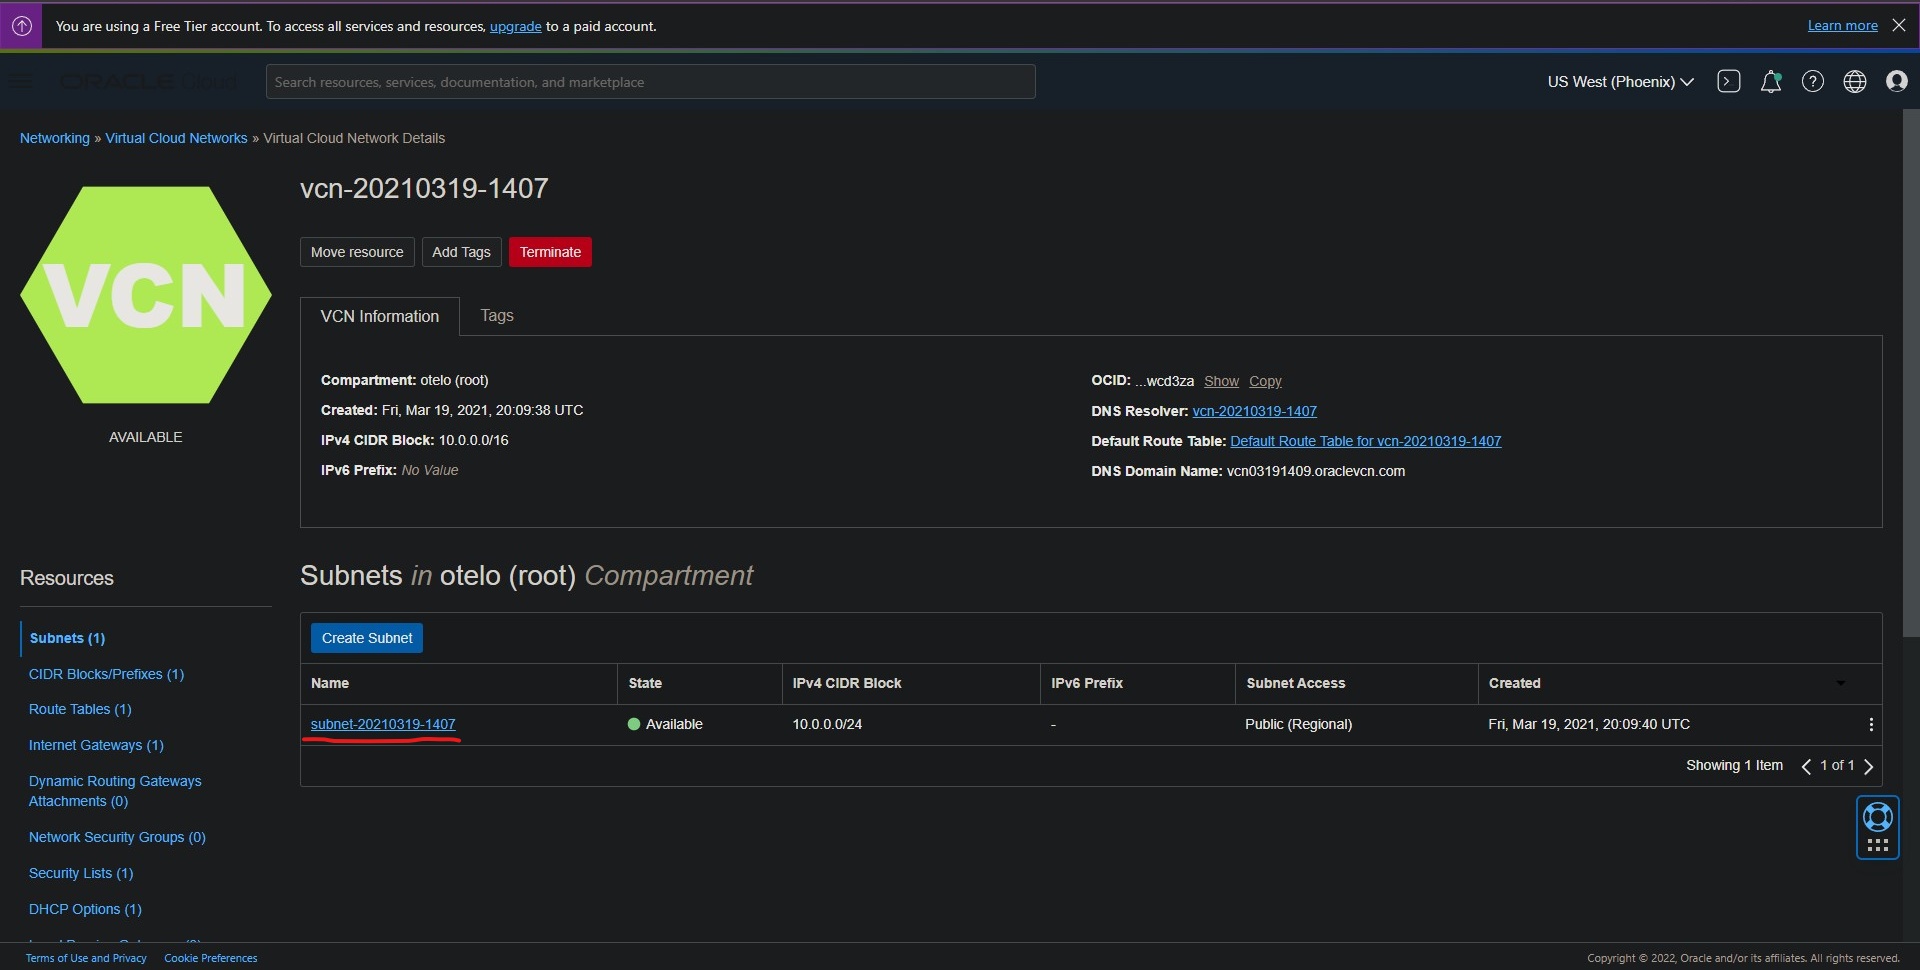
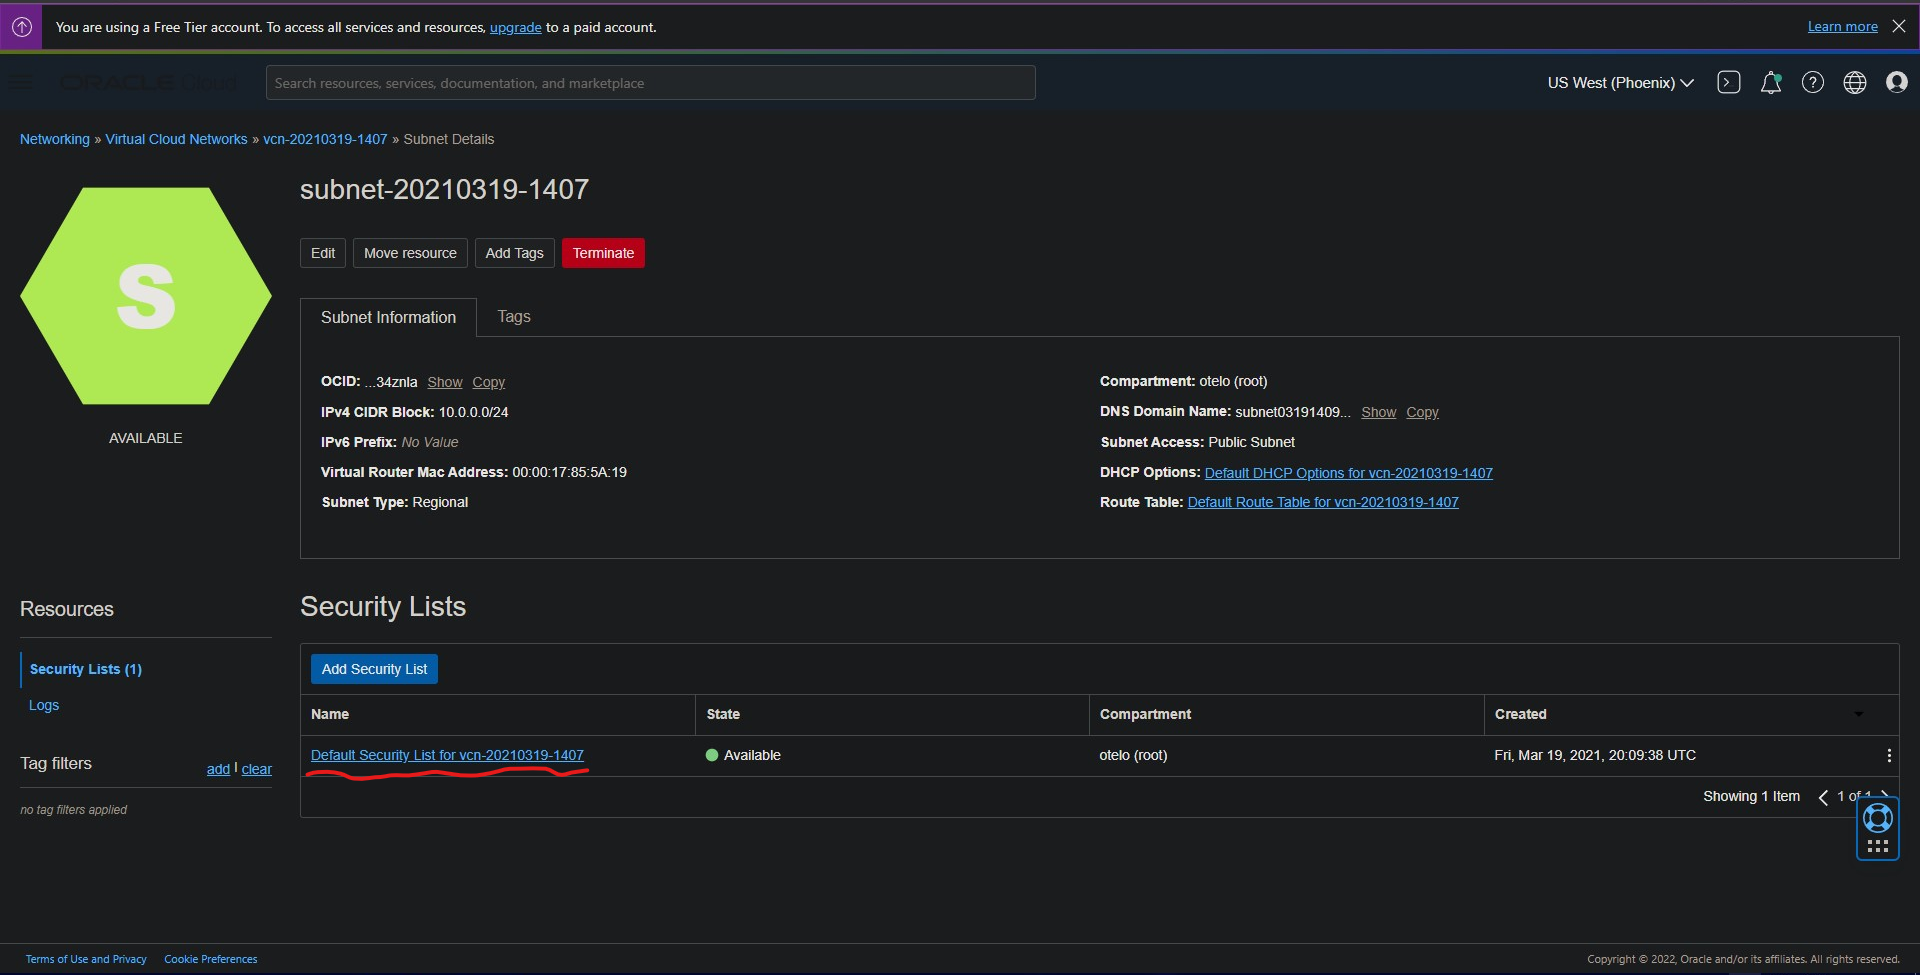
Go to: Virtual cloud network -> Subnet -> Default security list -> Add Ingress rules And change the following settings:
- Stateless: Checked
- Source Type: CIDR
- Source CIDR: 0.0.0.0/0
- IP Protocol: TCP
- Source port range: (leave-blank)
- Destination Port Range: 80
- Description: Allow HTTP connections
Below are some screenshots to guide you.
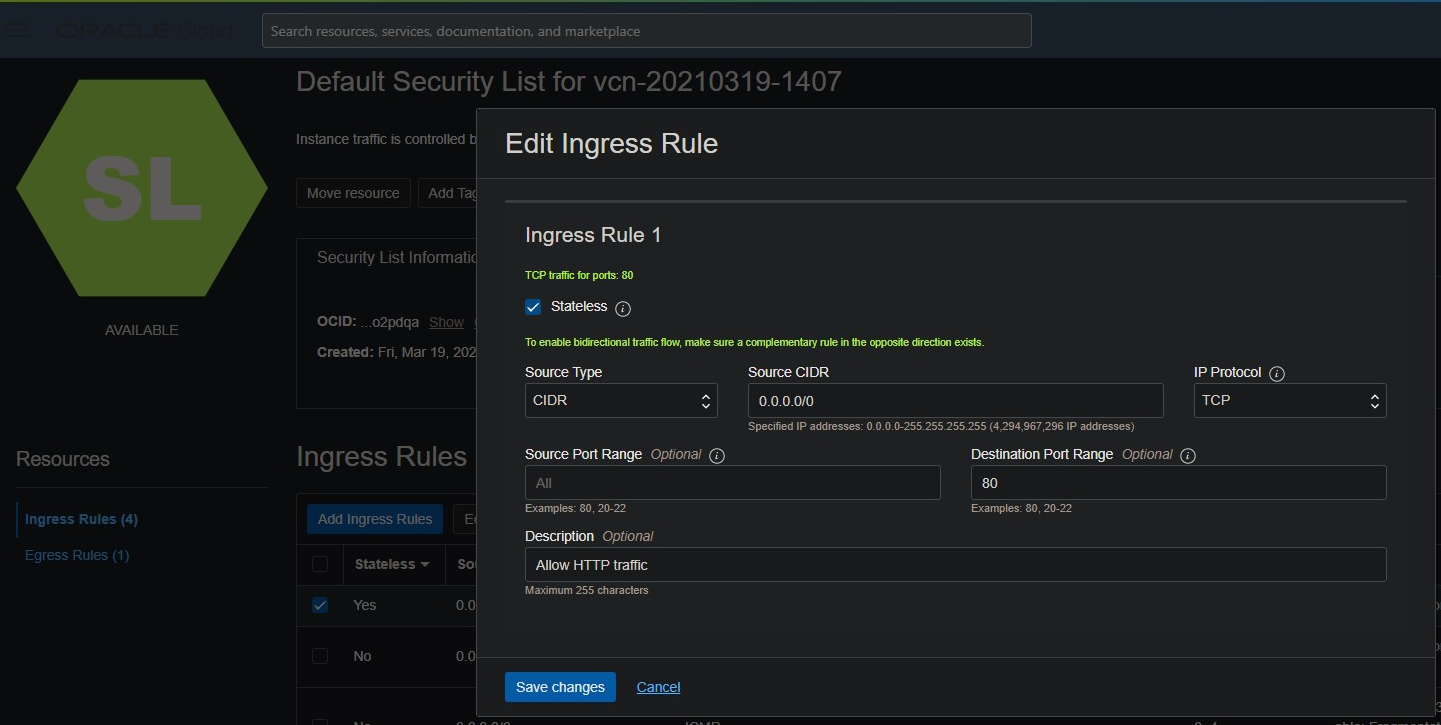
Add the rule. Now your VM is ready to accept HTTP traffic.
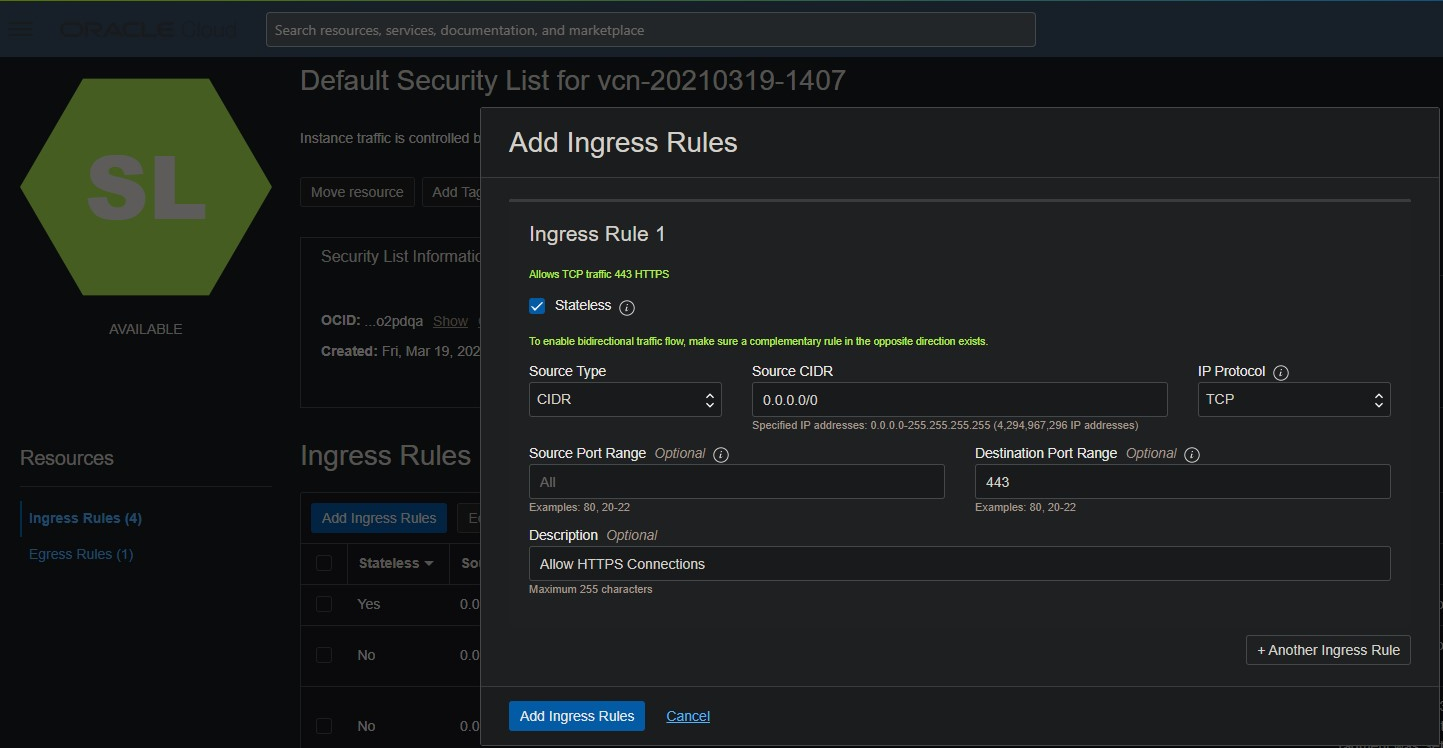
OPTIONAL: You can also add a rule for port 443 so you can accept HTTPS traffic.
Install and configure WordPress and dependencies
Configure Ubuntu Firewall
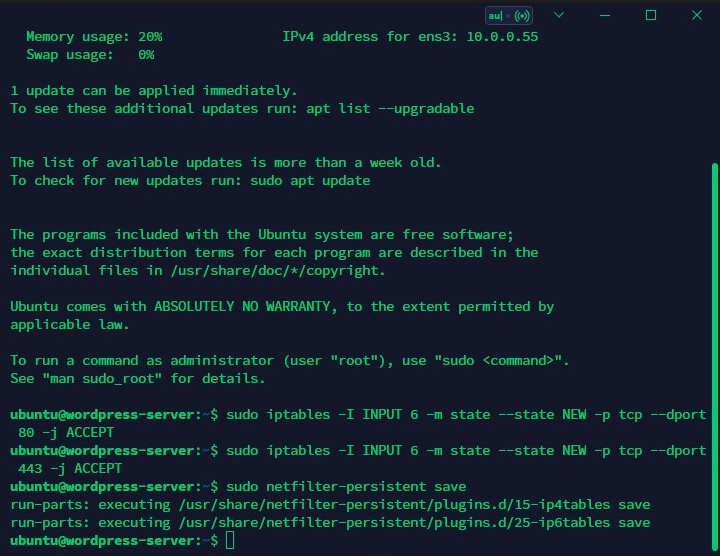
In the terminal of your VM run the following commands:
sudo iptables -I INPUT 6 -m state --state NEW -p tcp --dport 80 -j ACCEPT

#OPTIONAL: sudo iptables -I INPUT 6 -m state --state NEW -p tcp --dport 443 -j ACCEPT

sudo netfilter-persistent save
Install Apache Server
Run the commands:
sudo apt update

sudo apt -y install apache2

sudo systemctl restart apache2
Now go to your server’s public IP address on your browser. If you see the Apache2 Default Page we are doing good so far.

Install PHP
Install PHP and some modules:
sudo apt -y install php

sudo apt -y install php-mysql php-curl php-gd php-zip
Verify installation and restart Apache
php -v

sudo systemctl restart apache2
Add a test file to the VM:
sudo nano /var/www/html/info.php
The file should have these contents:
<?php
phpinfo();
?>
Now go to “your-public-address”/info.php .

If you see something like the screenshot above, then delete the info.php so we don’t leak any server info.
sudo rm /var/www/html/info.php
Configure the Apache HTML directory
Run the commands:
sudo adduser $USER www-data

sudo chown -R www-data:www-data /var/www/html

sudo chmod -R g+rw /var/www/html
And then sudo reboot to apply the changes.
Install and configure MySQL Server and Client
Run:
sudo apt -y install mysql-server

sudo mysql_secure_installation
Then turn on Password Validation, set a password validation level and set a root password. The other settings you can change to your liking.
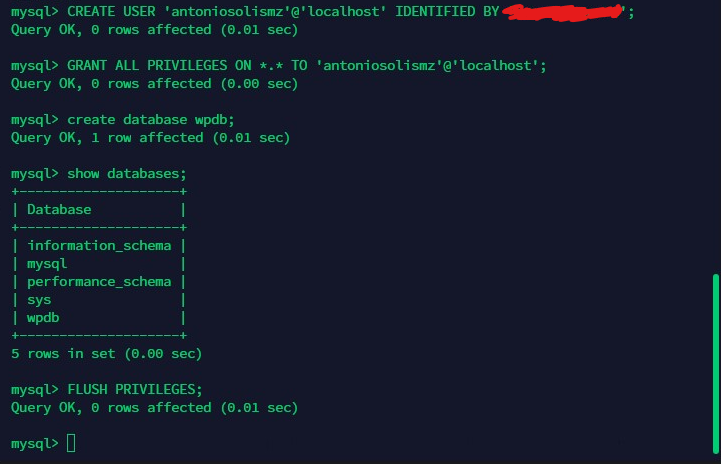
Now login to MySQL with sudo mysql. Your prompt should change to MySQL’s. Run:
show databases;

# Don't remove the ''
CREATE USER '<your-user-name>'@'localhost' IDENTIFIED BY '<your-password>';

GRANT ALL PRIVILEGES ON *.* TO '<your-user-name>'@'localhost';

create database wpdb;

show databases;

FLUSH PRIVILEGES;
Install and configure WordPress
With the preparations done, we can finally install WordPress.
First start with creating a temporary directory using mkdir tmp
Now download the installer using wget https://wordpress.org/latest.zip
Get the unzip tool and unzip the installer
sudo apt install unzip

unzip latest.zip
Copy the contents of the wordpress directory (that the above command just created) to the /var/www/html directory and move to it.
cp -R ~/tmp/wordpress/* /var/www/html

cd /var/www/html
Now rename the default index.html file using mv index.html index.html.bak and also this other file mv wp-config-sample.php wp-config.php
Update the MySQL configuration using the values set up during MySQL’s configuration using nano wp-config.php
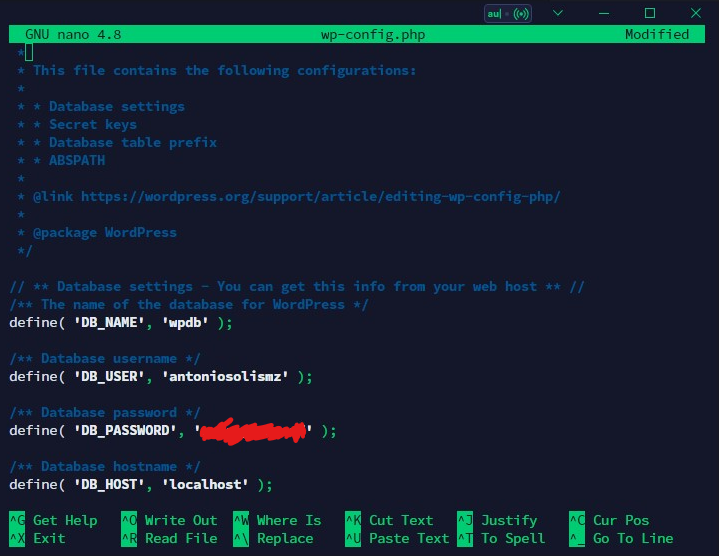
Now finish the configuration by going to: http://your-public-ip-address/wp-admin/install.php
And we are done! You can go to http://your-public-ip-address to see your WordPress blog.
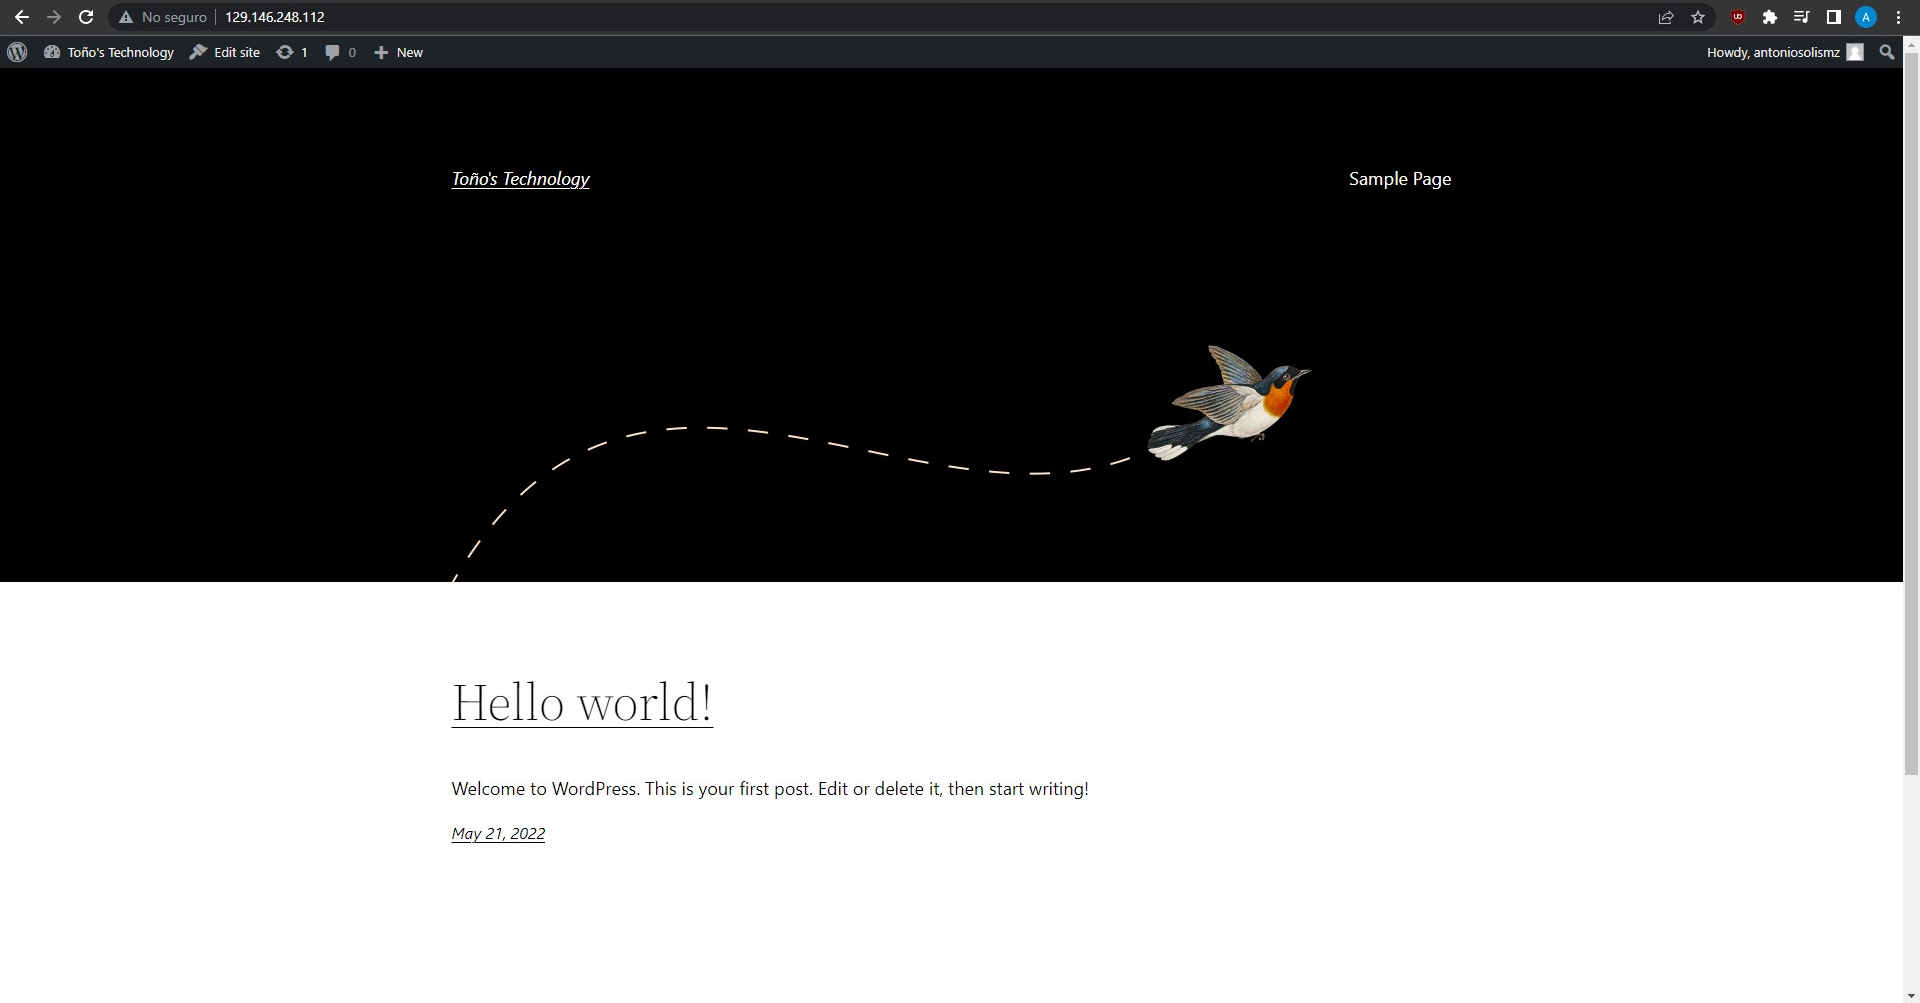
Add blog as a subdomain
Now we can access the blog using the server’s public IP, but it doesn’t look very pretty. We’ll use our domain and add the blog as a subdomain.
For this (optional) section we bought a domain via Cloudflare (very cheap, maybe the cheapest option possible for a .com domain) and are going to add the WordPress server’s public IP as a subdomain.
After logging into the Cloudflare dashboard (https://dash.cloudflare.com/), we select our domain and go to the “DNS” section in the right.
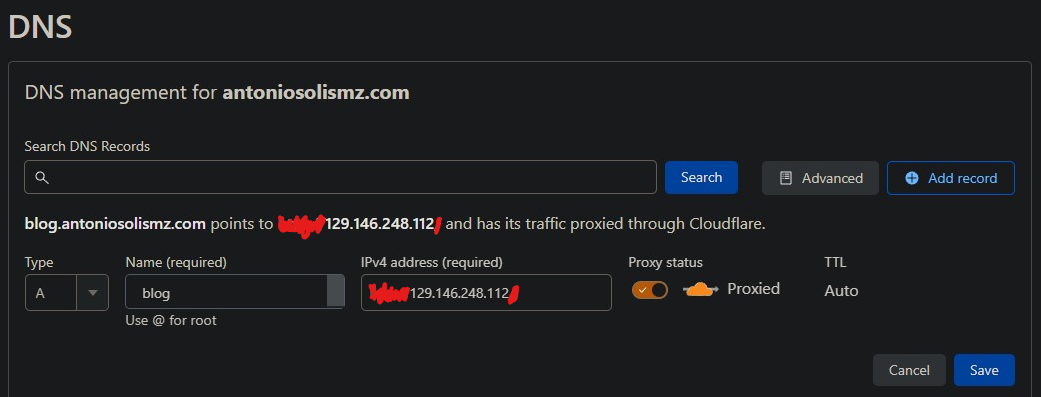
Now click on “Add record”, set the type as “A”, whatever name you want for the subdomain (“blog”) in my case, and the public IP address of the WordPress server. Finally click on “Save”. (Ignore the red scribble, I copy-pasted from the browser and the http:// was copied too lol).
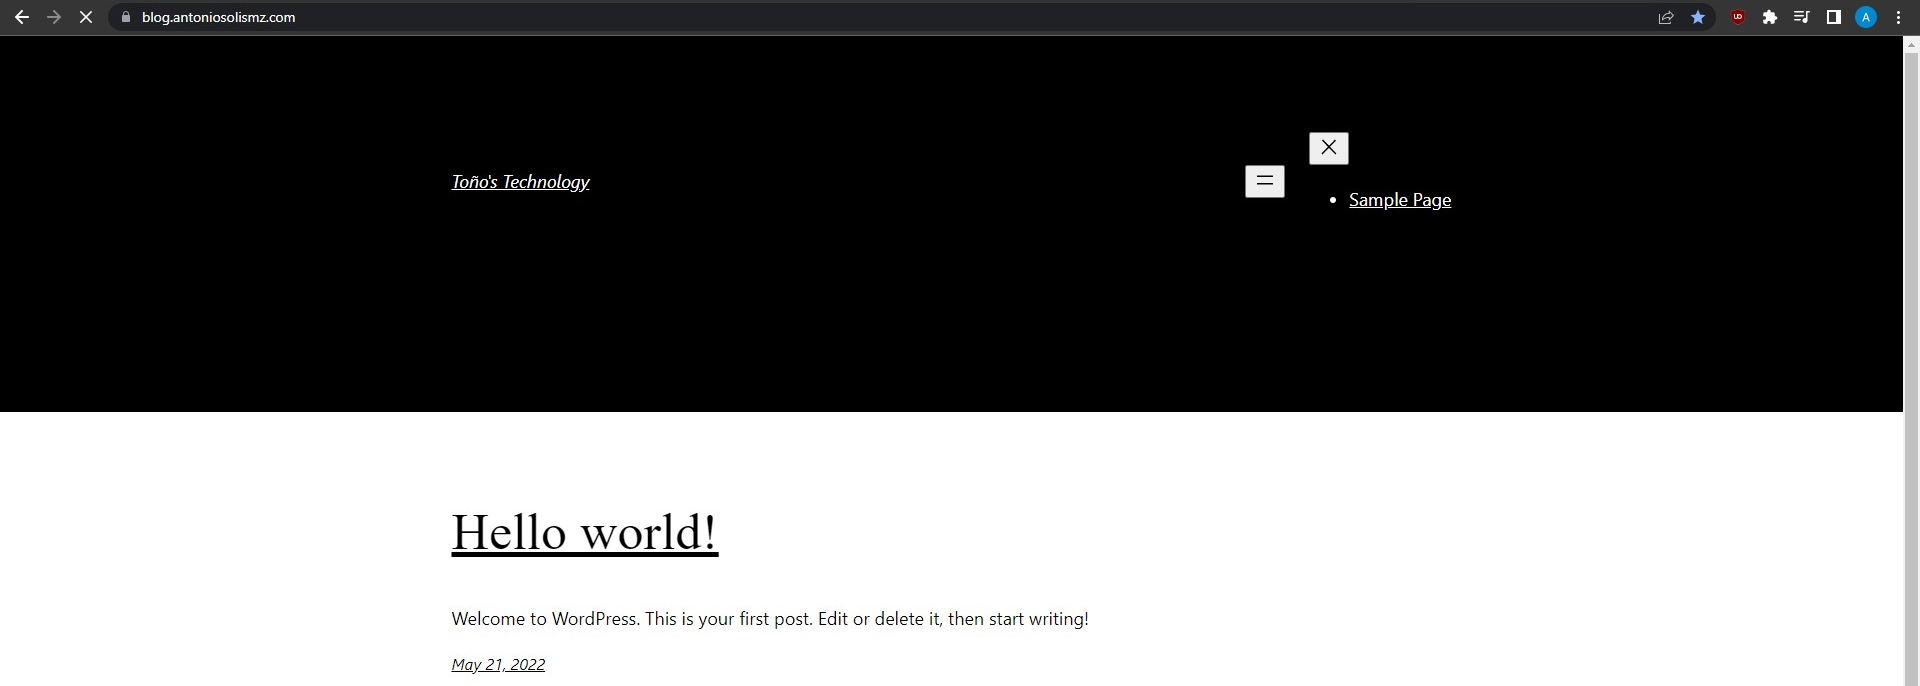
Now we can access our blog using https://blog.antoniosolismz.com/ instead of the IP address, which looks much prettier in my opinion.
==VERY IMPORTANT NOTE==: It is necessary to install the “Cloudflare Flexible SSL” WordPress plugin if you want to use Cloudflare’s Flexible SSL setting with your blog. Failing to do so will cause (at least in my case) a redirection loop when trying to access wp-admin. Check the further reading section for more guidance.
Conclusions
We set up a VM using Oracle Cloud, configured it to be a WordPress server, made it accessible over the internet, and added it as a subdomain to our existing domain.
This was an interesting project and I specially liked the configuration steps. In all honesty Oracle’s documentation does a way better job explaining the process, but this is just for my later reference anyway :)
I hope you found this helpful or at least interesting, let me know your thoughts and feedback in the comments or via Twitter.
Sources & further reading
https://docs.oracle.com/en-us/iaas/developer-tutorials/tutorials/wp-on-ubuntu/01-summary.htm https://www.icontrolwp.com/blog/enabling-cloudflares-universal-flexible-ssl-wordpress-without-infinite-redirect-loops/