Setting up Pi-Hole with a recursive DNS Server
Table of Contents
Setting up Pi-Hole with a recursive DNS Server
This is a project I’ve been postponing for about two weeks. In my experience setting up Pi-Hole isn’t hard at all but it always ends up taking longer than I expect it to, mainly because I have to track down the sources I used to set it up months ago, so this post will also be for me to later just have it as a reference instead of watching the same video over and over.
But what is Pi-Hole with a recursive DNS Server?
In short, Pi-Hole is used mainly for ad blocking, specially on devices where it isn’t feasible or even impossible to install an ad blocker, like a TV. It has the benefit of blocking ads on the network level, so in theory it can even speed up your connection by dropping data that you would’ve just ignored anyway.
Having it with a recursive DNS Server means that your device that acts as a Pi-Hole can also act as your DNS server, which in some cases can be faster (caching sites that you usually visit) and even more secure, since your request will go directly to the Root Name Servers and get the IP for the domain, thus the company that provides you with the DNS service (Google or your ISP) in theory won’t know which sites you are visiting due to the DNS request.
Sounds good doesn’t it? Lets get started.
Assumptions
For this project we are assuming:
- We have a Raspberry Pi to run Pi-Hole (I have a Pi Zero W)
- We have an SD card to flash the OS
- We can figure out when a network problem is due to DNS (it may break at some point. A restart will fix it but it is one more step in the diagnostic list)
Flashing the OS
We’ll start by downloading Raspberry Pi Imager to install Raspberry Pi OS to our SD card (on a previous version of this post we used etcher, but I think the Imager has some more useful features). We can find the installer here.
Install and run the Raspberry Pi Imager.
Once you open it it will have three options: Choose OS, Choose Storage and Write. For the OS I use Raspberry Pi OS Lite and the storage is my 32GB SD card.
Now we could click on Write and start the process, but we are going to click on the cog icon on the bottom right.
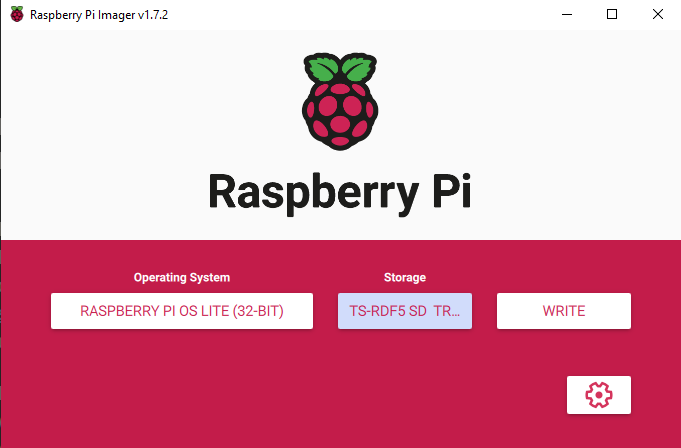
Since I want this to be a headless (no desktop environment) install, I need to access it via SSH. Previously we had to add the files manually to enable SSH and connect it to our network, but thankfully they’ve made this process much simpler.
The options changed are:
- Set hostname: raspi (optional)
- Enable SSH
- Use password authentication
- Set username and password
- pi
- your-password-here
- Configure wireless LAN (It pre-fills it with your current network!!!)
- Wireless LAN country: Your-Code (MX in my case)
Now with SSH configured, we can Write the OS to the SD card. This takes a pair of minutes so I went to grab a cup of water.
When it finishes you will see a message like this one:
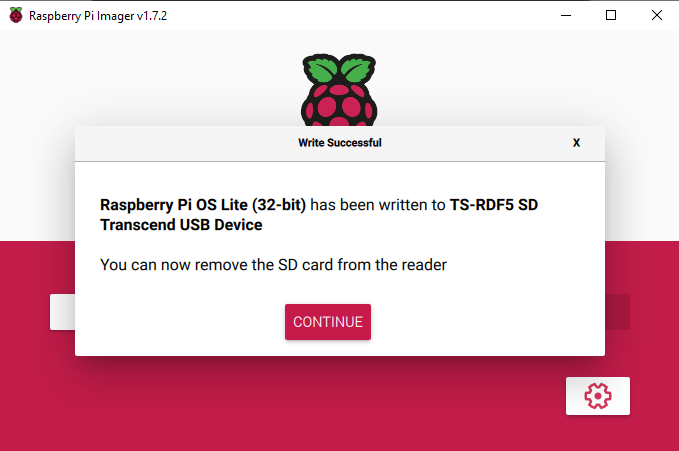
Remove the SD card and put it into your Pi.
Installing Pi-Hole
On your Pi (I found the IP address using the Fing mobile app): Get the installation script from Pi-hole’s GitHub. The One-Step Automated Install script as of the time of this writing is:
curl -sSL https://install.pi-hole.net | bash
The install script will begin and you just have to follow along and select the options you want. The configuration I used was:
- Static IP Address
- No, Set static IP using custom values
- Enter your desired IP and gateway
- No, Set static IP using custom values
- Upstream DNS provider
- Google (Will modify it later)
- Install web admin interface
- Install web server and PHP modules
To change the password of the web interface run:
pihole -a -p yourPasswordHere
Setting Pi-Hole as DNS server for your devices
Now we need to set the static IP of the pi-hole server to the devices we want to block ads on. The easiest way would be to set it as the DNS server from your router, but in my case I want a finer grain control so I’ll do it manually in each device.
Windows
Right click network icon -> Change adapter options -> Right click on your network adapter -> Properties -> Enable Internet Protocol v4 -> Properties -> Use the following DNS addresses -> Your-Pi-Hole-IP-Address.
Android
Settings -> Network & Internet -> Wi-Fi -> Your network settings (cog icon) -> Edit -> DNS 1 & 2 -> Your-Pi-Hole-IP-Address.
Installing Unbound (recursive DNS server)
Install unbound:
sudo apt install unbound
Create the configuration file /etc/unbound/unbound.conf.d/pi-hole.conf and write the following:
server:
    # If no logfile is specified, syslog is used
    # logfile: "/var/log/unbound/unbound.log"
    verbosity: 0

    interface: 127.0.0.1
    port: 5335
    do-ip4: yes
    do-udp: yes
    do-tcp: yes

    # May be set to yes if you have IPv6 connectivity
    do-ip6: no

    # You want to leave this to no unless you have *native* IPv6. With 6to4 and
    # Terredo tunnels your web browser should favor IPv4 for the same reasons
    prefer-ip6: no

    # Use this only when you downloaded the list of primary root servers!
    # If you use the default dns-root-data package, unbound will find it automatically
    #root-hints: "/var/lib/unbound/root.hints"

    # Trust glue only if it is within the server's authority
    harden-glue: yes

    # Require DNSSEC data for trust-anchored zones, if such data is absent, the zone becomes BOGUS
    harden-dnssec-stripped: yes

    # Don't use Capitalization randomization as it known to cause DNSSEC issues sometimes
    # see https://discourse.pi-hole.net/t/unbound-stubby-or-dnscrypt-proxy/9378 for further details
    use-caps-for-id: no

    # Reduce EDNS reassembly buffer size.
    # IP fragmentation is unreliable on the Internet today, and can cause
    # transmission failures when large DNS messages are sent via UDP. Even
    # when fragmentation does work, it may not be secure; it is theoretically
    # possible to spoof parts of a fragmented DNS message, without easy
    # detection at the receiving end. Recently, there was an excellent study
    # >>> Defragmenting DNS - Determining the optimal maximum UDP response size for DNS <<<
    # by Axel Koolhaas, and Tjeerd Slokker (https://indico.dns-oarc.net/event/36/contributions/776/)
    # in collaboration with NLnet Labs explored DNS using real world data from the
    # the RIPE Atlas probes and the researchers suggested different values for
    # IPv4 and IPv6 and in different scenarios. They advise that servers should
    # be configured to limit DNS messages sent over UDP to a size that will not
    # trigger fragmentation on typical network links. DNS servers can switch
    # from UDP to TCP when a DNS response is too big to fit in this limited
    # buffer size. This value has also been suggested in DNS Flag Day 2020.
    edns-buffer-size: 1232

    # Perform prefetching of close to expired message cache entries
    # This only applies to domains that have been frequently queried
    prefetch: yes

    # One thread should be sufficient, can be increased on beefy machines. In reality for most users running on small networks or on a single machine, it should be unnecessary to seek performance enhancement by increasing num-threads above 1.
    num-threads: 1

    # Ensure kernel buffer is large enough to not lose messages in traffic spikes
    so-rcvbuf: 1m

    # Ensure privacy of local IP ranges
    private-address: 192.168.0.0/16
    private-address: 169.254.0.0/16
    private-address: 172.16.0.0/12
    private-address: 10.0.0.0/8
    private-address: fd00::/8
    private-address: fe80::/10
Start the local recursive server and test that it is working:
sudo service unbound restart
dig pi-hole.net @127.0.0.1 -p 5335
You should get something like
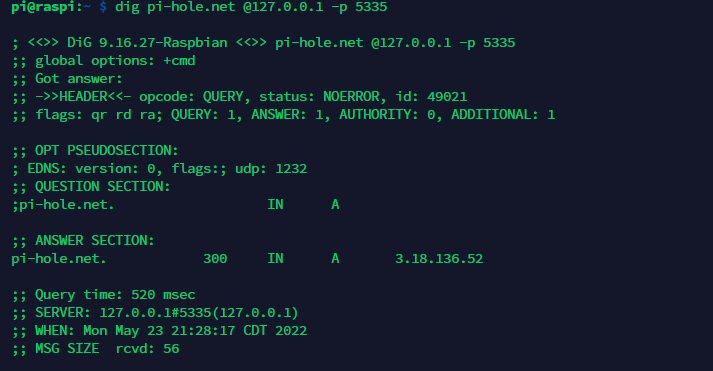
To further test if it works, you can run:
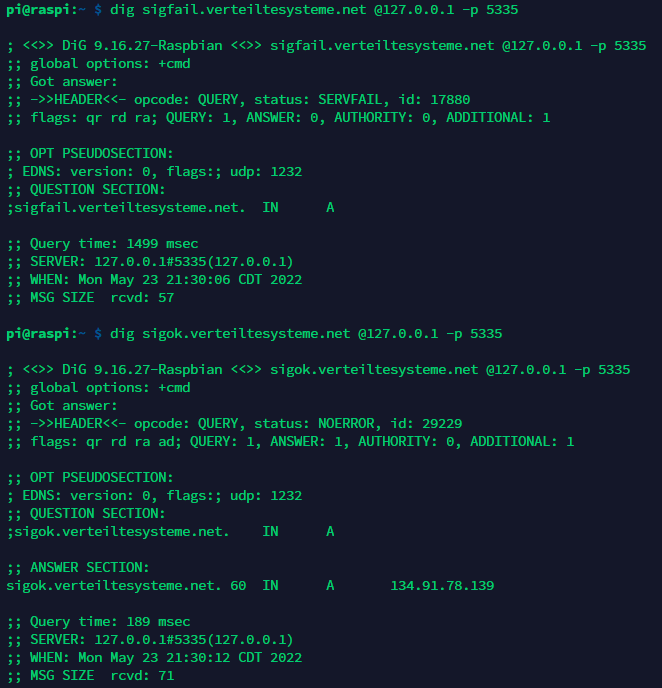
dig sigfail.verteiltesysteme.net @127.0.0.1 -p 5335
dig sigok.verteiltesysteme.net @127.0.0.1 -p 5335
The first command should give a SERVFAIL status and the seconds a NOERROR status.
Adding the Unbound DNS to Pi-Hole
Now on the Pi-Hole web interface we can go to Settings -> DNS and remove the Google DNS and add our custom DNS.
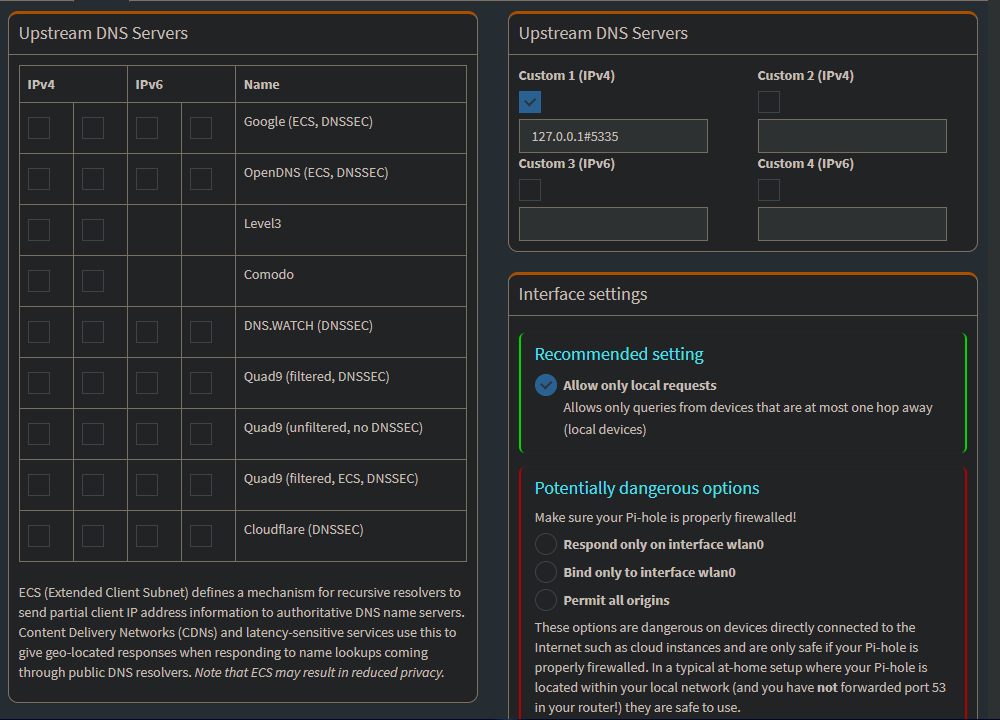
Click on save at the bottom of the page and we are done!
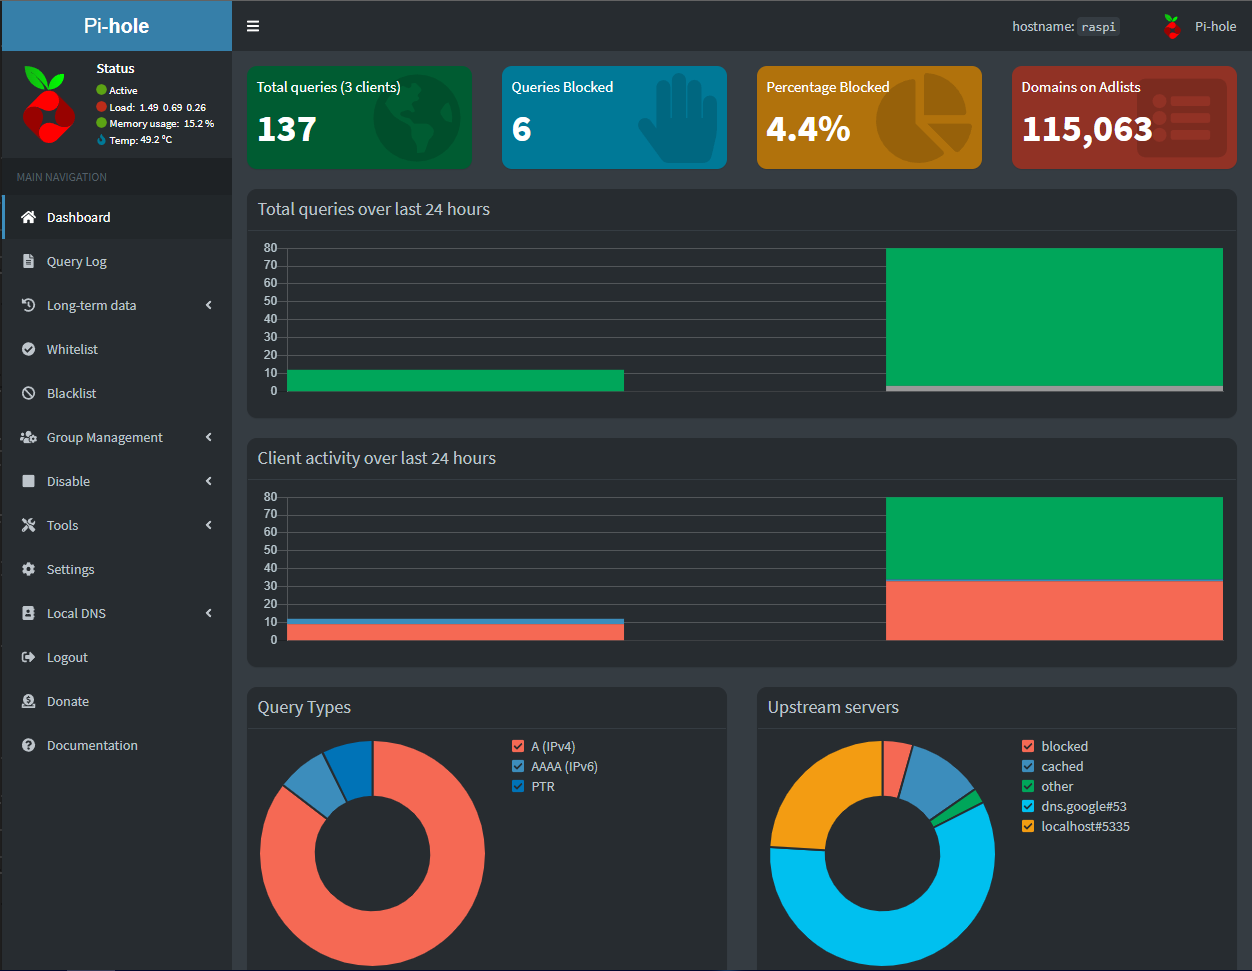
Conclusions
This is a process I’ve done like three or four times already, so there wasn’t much different now or new things to learn. One thing that I did find very nice and I’m glad exists is the possibility of configuring the Raspberry Pi right there on the Imager, since before it was another google search for the right file to add and having to check my network configuration; I’m honestly super thankful that it is almost automatic now.
Also I find Pi-hole to be very useful. I always use uBlock Origin but it only works on my desktop so I don’t have any way to block ads on my phone, and even on my desktop for anything not in the browser I didn’t have anything to block ads. With Pi-hole I just change the DNS in whatever device I want and now I don’t even have to worry about it, it is completely transparent to me.
I’ll be fair and also point out that in the case of your Pi-Hole bugging out or your Raspberry Pi losing power or connection, then you won’t have a DNS server and will have to either fix the issue or change back to Google’s DNS or whatever you use. It isn’t that big of a deal, but makes DNS related issues much more common than before.
Sources & further reading
https://www.youtube.com/watch?v=FnFtWsZ8IP0 https://docs.pi-hole.net/guides/dns/unbound/